Your home’s ductwork is the circulatory system for your HVAC system, carrying heated or cooled air to every room to keep you comfortable. Yet, because it’s hidden in walls, attics, and crawl spaces, it’s often forgotten. In many Bay Area homes, this unseen network of ducts is silently leaking, wasting energy, driving up utility bills, and damaging indoor air quality. A small tear or a loose connection might not seem like a big deal, but the cumulative effect can be enormous.
Leaky ducts can force your heating and cooling system to work much harder to maintain the desired temperature, leading to unnecessary wear and tear. Even worse, they can pull dusty, contaminated air from unconditioned spaces like your attic or crawl space and circulate it throughout your home. Understanding how to spot the signs of duct leaks is the first step toward a more efficient, comfortable, and healthy living environment.
This guide will walk you through the common symptoms of failing ductwork. We’ll provide simple tests you can perform yourself to check for potential leaks and explain why a professional duct inspection in the Bay Area is the most reliable way to diagnose the problem. Learning about your ducts is an investment in your home’s performance and your family’s well-being.
The Hidden Costs of Leaky Ducts
Before we explore how to find leaks, it’s important to understand why they matter so much. Leaky ductwork isn’t just a minor inconvenience; it has significant financial and health-related consequences for homeowners. The Department of Energy estimates that the typical home loses 20 to 30 percent of the air that moves through its duct system due to leaks, holes, and poor connections.
1. Skyrocketing Energy Bills
When conditioned air escapes from your ducts before it reaches the intended rooms, your HVAC system has to run longer and more frequently to compensate. You are paying to heat or cool your attic, crawl space, or the inside of your walls. This wasted energy translates directly into higher monthly utility bills. If you’ve noticed a steady, unexplained increase in your energy costs, leaky ducts are a prime suspect. Fixing them can be one of the most effective energy-saving measures you can take.
2. Poor Indoor Air Quality in Bay Area Homes
This is a critical concern that many homeowners overlook. Duct leaks create a pressure imbalance in your home. Supply leaks (ducts carrying air from your HVAC unit) lower the air pressure, while return leaks (ducts pulling air back to your unit) can create negative pressure. This negative pressure can cause your home to suck in air from undesirable places.
Instead of pulling air from your living room, a leaking return duct in the attic or crawl space will pull in whatever is there: dust, insulation fibers, mold spores, rodent droppings, and other contaminants. This polluted air is then sent directly to your HVAC unit, which circulates it throughout your entire home. This can be a major trigger for allergies, asthma, and other respiratory issues, seriously impacting your home’s indoor air quality in the Bay Area.
3. Inconsistent Temperatures and Comfort Issues
Are some rooms in your house always too hot or too cold, no matter how you adjust the thermostat? Leaky ducts are a very common cause of this problem. When a significant amount of conditioned air is lost on its way to a particular room, that space will never reach the target temperature. You might find yourself constantly fiddling with the thermostat or closing vents in some rooms to force more air into others, but these are just temporary fixes for an underlying infrastructure problem.
4. Premature HVAC System Failure
A leaky duct system places a constant, unnecessary strain on your heating and cooling equipment. The system has to work harder and run longer to do its job. This added wear and tear can lead to more frequent breakdowns and shorten the lifespan of your expensive furnace, air conditioner, or heat pump. Investing in duct repair in the Bay Area is also an investment in protecting your HVAC unit. A system that runs efficiently will last longer and require fewer repairs. If you find yourself frequently calling for heating and cooling repair in the Bay Area, the problem might not be the unit itself, but the ducts it’s connected to.
Telltale Signs: How to Spot a Potential Duct Leak
You don’t have to be an HVAC expert to notice the symptoms of leaky ducts. Pay attention to your home’s behavior and your own comfort levels. Here are some of the most common signs that your ductwork needs attention.
Unusually High Utility Bills
As mentioned, this is often the first red flag. If your heating and cooling bills have been creeping up without a corresponding change in your usage habits or a major spike in utility rates, it’s a strong indicator of system inefficiency. Compare your recent bills to those from the same months in previous years. A significant, unexplained increase warrants an investigation, and ducts are a great place to start.
Rooms That Are Difficult to Heat or Cool
If you have a “problem room” that is always stuffy in the summer and chilly in the winter, it could be due to a disconnected or leaking duct line that is supposed to be supplying that area. You may also notice weak airflow coming from the vents in that particular room.
Excessive Dust in Your Home
Do you feel like you are constantly dusting, no matter how often you clean? Leaky return ducts pulling in dirty air from attics and crawl spaces can distribute dust and debris throughout your home. If you notice that dust and dirt quickly accumulate on surfaces shortly after cleaning, your ductwork could be the culprit.
Stuffy or Musty Odors
When your system is running, do you notice strange smells? Leaky ducts can pull in odors from the spaces they run through. A musty or moldy smell could indicate that your ducts are drawing in damp air from a crawl space. A dusty or stale smell might point to air being pulled from a dirty attic. These odors are a direct sign that your indoor air is being contaminated.
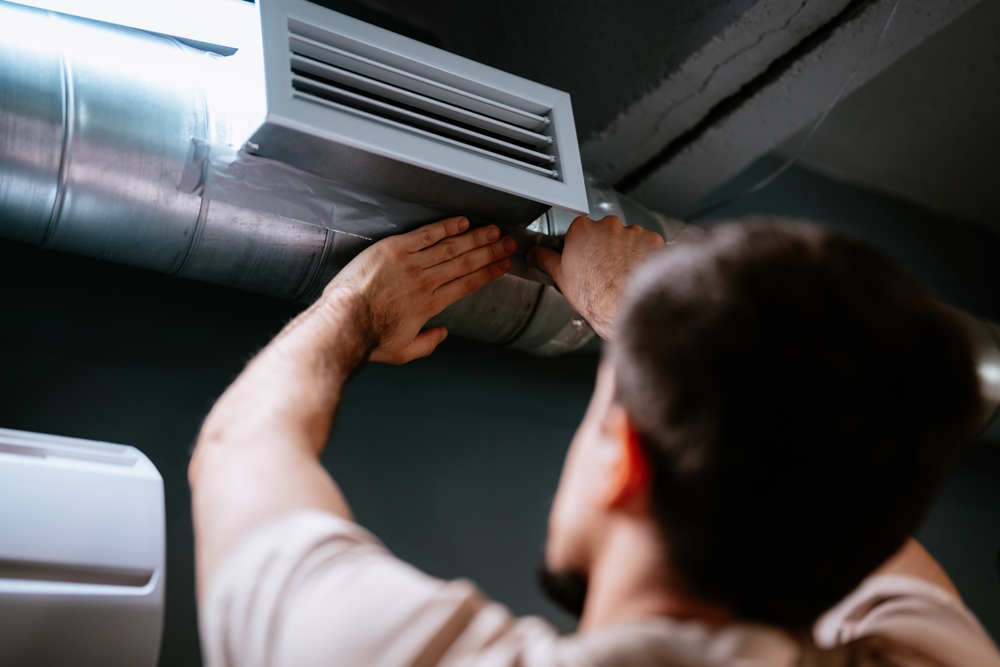
A Visual Inspection of Accessible Ductwork
You can perform a simple visual inspection of any ductwork you can safely access. Go into your attic, basement, or crawl space and look at the ducts. Be on the lookout for:
- Obvious rips, tears, or holes.
- Duct sections that have come apart or are disconnected. This is especially common at joints where two sections meet or where a duct connects to a vent boot.
- Kinked or crushed flexible ducts. Flexible duct lines can easily be damaged or compressed, which restricts airflow just as much as a leak.
- Stains or discoloration around duct seams. This can indicate that air has been leaking out over a long period, depositing dust and dirt on the exterior of the duct.
Simple DIY Tests for Leaky Ducts
While a professional diagnosis is always best, there are a few simple tests you can perform yourself to gather more evidence of a potential leak.
The “Feel” Test
This is the most straightforward test. On a day when your HVAC system is running (either heating or cooling), go to the accessible parts of your ductwork. Carefully run your hand along the seams and joints of the ducts. Can you feel air blowing out? If you feel any airflow, you’ve found a leak. This method works best for larger leaks but may not detect smaller ones.
The Smoke or Incense Test
This test can help you visualize smaller leaks that are difficult to feel. For this, you’ll need a smoke pen, a stick of incense, or even a candle that produces a thin trail of smoke.
- Turn on your HVAC system’s fan to “On” mode (not “Auto”) at the thermostat. This ensures air is constantly circulating through the ducts.
- Safely go to an area with accessible ductwork.
- Hold the smoke source near the seams, joints, and connections of the ducts.
- Watch the smoke trail closely. If the smoke is blown away from the duct or pulled toward it, you have a leak. If the smoke remains undisturbed, the seal is likely intact.
Safety Note: Be extremely careful when using anything that produces smoke or has a flame, especially in dusty attics with exposed insulation. A smoke pen (a tool designed for this purpose) is the safest option.
Checking Airflow at the Vents
This test helps identify airflow imbalances.
- Turn on the system fan.
- Walk through your house and hold your hand over each supply vent.
- Do some vents have significantly weaker airflow than others? While some variation is normal (vents closer to the air handler will naturally have stronger flow), a very weak vent could indicate a major leak or a disconnected duct run leading to that room.
These DIY tests can help you confirm your suspicions, but they have limitations. They can only check the parts of the ductwork you can see and access, and they may not quantify the full extent of the leakage. Much of your ductwork is hidden behind drywall or buried under insulation, where some of the worst leaks often occur.
Why You Need a Professional Duct Inspection in the Bay Area
While DIY tests are a good starting point, they can’t replace a comprehensive assessment by a certified HVAC professional. Technicians have specialized tools and expertise to accurately measure the performance of your entire duct system, including the hidden parts. A professional duct inspection in the Bay Area is the definitive way to understand the health of your ductwork.
Blower Door Test
A blower door test is often performed as part of a whole-home energy audit. It involves mounting a powerful fan in an exterior doorway to depressurize the entire house. By measuring how much air the fan has to pull out of the house to maintain a certain pressure, technicians can calculate the home’s overall air leakage rate. While this measures total home leakage (from windows, doors, etc.), it provides a baseline for understanding how much duct leakage might be contributing to the problem.
Duct Leakage Test (Duct Blaster® Test)
This is the gold standard for accurately measuring duct leakage. A duct blaster test involves:
- Sealing all the vents: Your technician will temporarily seal all the supply and return vents in your home with tape or grilles.
- Connecting the duct blaster: A calibrated fan, or “duct blaster,” is connected to the duct system, usually at the main return grille or at the air handler itself.
- Pressurizing the system: The fan blows air into the sealed duct system, bringing it to a standard pressure (typically 25 Pascals).
- Measuring the leakage: A pressure gauge and airflow meter connected to the fan measure how much air volume per minute is required to maintain that pressure. This number represents the total leakage of your entire duct system, measured in Cubic Feet per Minute (CFM).
The results of a duct blaster test are precise. The technician can tell you exactly how much your ducts are leaking and compare it to industry standards for high-performance homes. This data allows them to determine whether duct repair in the Bay Area or a full duct replacement in the Bay Area is the most cost-effective solution.
Solving the Problem: Duct Repair vs. Duct Replacement
Once a professional inspection confirms you have significant duct leakage, the next step is to fix it. The solution will generally fall into one of two categories: sealing the existing ducts or replacing them entirely.
Professional Duct Sealing
For ducts that are in generally good structural condition but have leaks at seams and joints, professional sealing is highly effective. This is not a job for standard duct tape. The gray, cloth-backed tape sold in hardware stores is notoriously bad for sealing ducts; it dries out, becomes brittle, and fails quickly.
Professional technicians use robust materials designed for longevity:
- Mastic Sealant: This is a gooey, paint-on substance that is applied to all seams and connections. When it dries, it creates a tough, flexible, and permanent seal.
- Foil Tape: High-quality foil tape, often approved by Underwriters Laboratories (UL), is used to bridge gaps or hold connections together before mastic is applied.
A technician will meticulously go through your accessible ductwork, sealing every joint, seam, and connection to make it airtight.
When Is Duct Replacement Necessary?
In some cases, sealing is not enough. A full duct replacement in the Bay Area may be the better long-term solution if your ductwork suffers from:
- Poor Design or Sizing: If your ducts were improperly sized for your original HVAC system, they will certainly be inadequate for a new, high-efficiency unit.
- Extensive Damage: Ducts that are crushed, kinked, torn in multiple places, or contaminated with mold may be too far gone to repair effectively.
- Old or Inefficient Materials: Older homes may have uninsulated or poorly insulated ducts, which lose a tremendous amount of energy through thermal transfer.
- Accessibility Issues: If the majority of the leaks are in inaccessible areas, it may be more practical to decommission the old ducts and run new, properly sealed ones.
A professional ductwork installation in the Bay Area ensures that your new system is designed and sized correctly for your home and your HVAC equipment, maximizing efficiency and comfort from day one.
The Long-Term Benefits of a Sealed Duct System
Investing in duct repair or replacement is an investment that pays you back in multiple ways. You’ll enjoy lower energy bills, improved comfort, and a healthier living environment. Your HVAC system will run more efficiently, last longer, and require fewer repairs. If you’ve been having recurring issues and searching for “hvac repair near me,” fixing your ducts could solve the root cause of the problem.
A well-sealed duct system is also a prerequisite for getting the most out of a new high-efficiency heating and cooling system. Installing a top-of-the-line heat pump or air conditioner connected to a leaky duct system is like buying a sports car and driving it on four flat tires.
If you suspect your ducts are leaking or you’re experiencing any of the warning signs discussed, don’t wait for the problem to get worse. Our team provides expert diagnostic services, from visual inspections to comprehensive duct blaster testing. We offer professional residential HVAC repair services for all duct-related issues and can advise you on the best course of action. And for urgent problems, our emergency HVAC repair in the Bay Area team is always ready to help. From sealing and repairs with our residential HVAC maintenance services to full system overhauls with our residential HVAC installation services or residential HVAC replacement services, we have the expertise to restore your home’s performance.
Contact us today to schedule a professional duct inspection and take the first step toward a more efficient, comfortable, and healthy home.
Stay Comfortable Year-Round With Expert HVAC Service
Book a trusted technician to handle your heating or cooling issue—fast, professional, and done right the first time.
Book Service Now